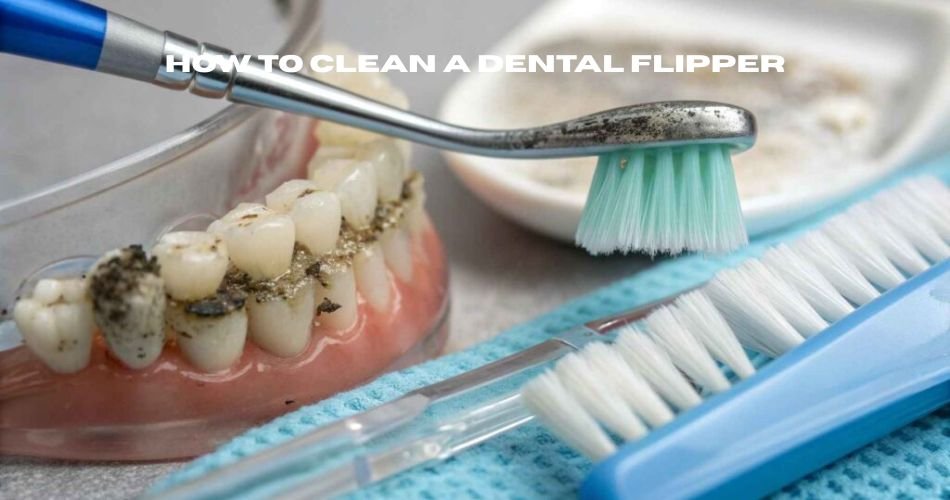
How to clean a dental flipper is a crucial step in maintaining both your oral hygiene and the longevity of your dental device. A dental flipper, while temporary, plays a big role in your smile and daily comfort, making proper care essential. Without regular cleaning, bacteria, plaque, and odors can quickly build up, leading to gum irritation or infections. Fortunately, cleaning a flipper is simple and doesn’t require special tools. With a few daily habits and proper techniques, you can keep it fresh and functional. In this guide, you’ll learn everything you need to know about keeping your dental flipper clean, safe, and comfortable.
Why Cleaning Your Dental Flipper Is Essential
Properly cleaning your dental flipper is critical to avoid a host of dental problems. When left unclean, food particles and bacteria can accumulate on the device, leading to unpleasant odors, gum irritation, and even infections. Just like your natural teeth, flippers need daily care to prevent plaque buildup. Furthermore, maintaining cleanliness enhances the durability of the flipper, preventing stains, discoloration, and structural damage. A clean flipper not only feels better in your mouth but also reduces the risk of complications that might require additional dental visits or replacements.
Daily Cleaning Habits for Dental Flippers
Incorporating dental flipper care into your daily routine doesn’t have to be time-consuming. Every morning and night, begin by removing the flipper and rinsing it under lukewarm water to remove any food residue. Using a soft-bristled toothbrush and a non-abrasive cleanser like mild dish soap, gently scrub the entire surface. Avoid using regular toothpaste, which can be too harsh and scratch the acrylic material. Once brushed, rinse it thoroughly before placing it back into your mouth or storing it for the night. This simple ritual helps keep your mouth clean and your flipper in top condition.
Safe Soaking Practices to Deep Clean Your Flipper
When learning how to clean a dental flipper, safe soaking practices are essential for deep cleaning and removing stubborn debris or odors. Soaking your flipper in a denture-cleaning solution or a mix of equal parts white vinegar and lukewarm water can help disinfect it effectively. Let it soak for 15–30 minutes, but avoid using hot water, as it can warp the acrylic. Always rinse the flipper thoroughly after soaking to remove any remaining solution. Deep soaking once or twice a week, combined with daily brushing, ensures your flipper stays fresh and bacteria-free. These practices are key to maintaining comfort, hygiene, and the life of your dental device.
Avoiding Common Cleaning Mistakes
Many people unknowingly damage their dental flippers by using the wrong cleaning methods. One of the biggest mistakes is using hot water, which can warp the plastic and render the device useless. Bleach and alcohol-based cleaners should also be avoided because they can degrade the acrylic and cause irritation in the mouth. Another mistake is scrubbing too hard with a firm-bristled toothbrush, which can scratch the surface and make it more susceptible to bacteria. Storing the flipper dry or in direct sunlight is also risky; always keep it in a moist, cool environment when not in use.
Proper Storage Techniques for Dental Flippers
When you’re not wearing your dental flipper, it should be stored in a clean, ventilated container filled with water or a denture-cleaning solution. This prevents the flipper from drying out and warping. It’s also wise to keep the container in a safe place away from children and pets, as flippers can be fragile and easily damaged if dropped or chewed. Never wrap it in a napkin or tissue, as this can lead to accidental disposal. Storing your flipper correctly extends its lifespan and ensures it remains comfortable and functional every time you wear it.
How to Handle Stains and Odors
Stains and odors are common issues for dental flipper wearers, especially if the device isn’t cleaned regularly. To remove stubborn stains, you can use a soft brush and a paste made from baking soda and water. Baking soda is gentle yet effective at lifting discoloration without damaging the acrylic. For persistent odors, soaking the flipper in a diluted vinegar solution can help neutralize bad smells. However, if these problems persist despite home remedies, it may be necessary to bring the flipper to your dentist for professional cleaning or evaluation for replacement.
Professional Cleaning and Dental Visits
While daily maintenance and deep cleaning at home are crucial, they don’t replace the need for regular dental check-ups. During your dental appointments, bring your flipper so your dentist can inspect it for wear and tear, ensure a proper fit, and provide a professional cleaning if needed. Dentists can also identify signs of bacterial buildup or damage that you may not notice. If your flipper begins to feel uncomfortable, loosens, or shows visible cracks, your dentist may recommend adjustments or even a replacement to maintain your oral health and comfort.
Dental Flippers for Kids and Seniors
Children and seniors may require special attention when it comes to dental flipper care. Kids using flippers due to early tooth loss need to be taught how to clean and store the device properly. For seniors, arthritis or reduced dexterity can make cleaning difficult, so using easy-to-grip brushes or soaking methods may be more practical. In both cases, consistency and supervision are key. Regardless of age, anyone wearing a flipper must be educated on proper hygiene to prevent dental issues and ensure the flipper continues to serve its purpose effectively.
Travel Tips for Flipper Wearers
When you’re on the go, knowing how to clean a dental flipper while traveling is just as important as when you’re at home. Always pack a small dental kit with a soft toothbrush, a portable case, and a travel-size cleaning solution or mild soap. Avoid storing your flipper in a napkin or pocket, as it can easily be lost or damaged. Clean it at least once daily, even on vacation, to prevent buildup and bad odors. If water is limited, rinse the flipper with bottled water and clean it thoroughly when possible. These simple habits help keep your dental flipper fresh and ready wherever your travels take you.
Replacing Your Dental Flipper When Needed
No matter how well you care for your flipper, it won’t last forever. Most dental flippers are designed as temporary solutions, typically lasting between six months to a year with good maintenance. Signs you need a new one include discomfort, cracks, discoloration that won’t go away, or changes in fit. If your flipper becomes loose or starts irritating your gums, it could lead to more serious dental issues. Always consult with your dentist if you suspect your flipper needs replacing, as they can provide a more durable or permanent solution tailored to your needs.
Conclusion
Caring for your dental flipper is a vital aspect of maintaining your oral hygiene and overall dental health. Learning how to clean a dental flipper effectively ensures that it remains comfortable, clean, and free of harmful bacteria. By following a consistent cleaning routine, using safe materials, and storing the flipper properly, you can avoid common problems such as odors, staining, and warping. Whether you’re using the flipper temporarily or long-term, giving it the attention it deserves will protect your mouth and prolong the life of the device. A clean flipper means a confident smile, healthier gums, and peace of mind.